
 Back carry tutorials so you can learn all the back carries with your woven wrap.
I have organized these back carry tutorials into short back carries, followed by supportive back carries, and then Double Hammock Carry (DHC) variations because DHC is such a popular carry and there are so many variations!

Rucksack Carry TIF (tied in front) – one rucksack pass and two bunched cross passes tied in front. Wrap size: base -2

Rucksack TUB (tied under bottom) – one rucksack pass and no waist pass – fast, light, and great for pregnancy or hot weather. Wrap size: base -4

Rebozo Back Carry – one single diagonal or rebozo pass, tied at shoulder, this is the carry that a ring sling was designed to emulate. Wrap size: rebozo or base -5

Reinforced Rear Rebozo Rucksack is frequently called RRRR or the Pirate Carry – a rucksack pass and a horizontal pass, tied at shoulder. Base size: base -3 or -4

Half Jordan’s Back Carry (HJBC) is a rebozo pass and a cross pass, tied at shoulder. Wrap size: base -3 or -4

Shepherd’s Carry is a very short variation of Double Hammock Carry with two rebozo passes that ties around the chest pass. Wrap size: base-3 or -4

Double Hammock Rebozo (DHR) is another short variation of Double Hammock with a rebozo pass and a horizontal pass that ties in front and has no waist pass. Wrap size: base -3 or -4

Back Wrap Cross Carry (BWCC) has a horizontal pass and two cross passes, then ties at the waist. Wrap size: base wrap size.

Charlie’s Cross Carry (CCC) has a cross pass, rebozo pass, and reinforcing pass over baby and chest pass and waist pass on the parent. Wrap size: base size

Christina’s Ruckless Back Carry with one cross pass, one rebozo pass, and one reinforcing cross pass and a unique and comfortable chest pass with no rucksack straps. Wrap size: base -1

Double Sling Shoulder to Shoulder (DSS2S, formerly DRS2S) has two traditional sling passes and two bunched cross passes over baby (just like Double Hammock) but with a unique chest belt. Wrap size: base

Ellevill Jordan’s Back Carry (EJBC) has two cross passes and a horizontal pass, with a waist pass and ruck straps. Wrap size: base -1
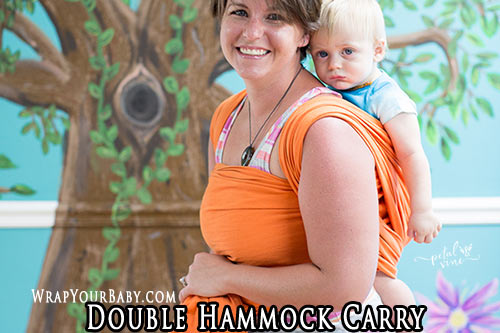
Double Hammock Carry (DHC): 2 sling (rebozo) passes & 2 bunched cross passes, ties in front. Wrap size: base

Double Hammock Carry, Freshwater Finish has a beautiful finish that many find more comfortable than rucksack straps. Wrap size: base or base +1

Poppins Double Hammock Carry is a pretty finish that turns DHC into a single shoulder carry but is still very supportive with a toddler. Wrap size: base wrap size or base +1

Double Hammock Carry Tied at Shoulder (DHC TAS) has one bunched horizontal pass behind baby’s knees and ties at the shoulder with no waste pass. Wrap size: base -1

Double Hammock Carry Tied Under Bottom (DHC TUB) is a short DHC variation that ties in back under baby’s bottom instead of coming around to the front. There is no waist pass. Wrap size: base -1
Explore the Database of Front Carries
Explore the Database of Hip Carries
Have fun learning back carries. Be sure to practice with a spotter or in a safe place – like over a bed. Once you know you can do it safely every time you will be ready to wrap anywhere. A back carry makes it easier to do chores or housework. Back wrapping will help you be able to prepare snacks or food. A back carry is the best comfort for long hikes and a back carry is great for toddlers and heavy kids. Toddlers and pre-schoolers don’t always like front carries but most love a back carry! The view from a back carry is the best and they don’t miss a thing 😉
